2023-11-12 79
效果图:
效果中云雾一直在移动 形成一种清晨云雾环绕的视觉效果 主要是通过设置一层云雾图片 覆盖在上面 通过运动图片达到云雾穿过的效果
html:
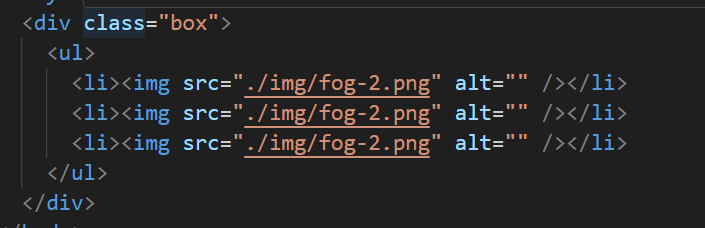
通过给box进行背景图设置 然后对ul下面的三张li 图片设置好宽高
* {
padding: 0;
margin: 0;
box-sizing: border-box;
}
.box {
width: 1330px;
height: 100vh;
background: url(./img/photo.jpg) no-repeat;
overflow: hidden;
position: relative;
}
ul {
display: flex;
width: 2660px;
height: 100%;
}
.box li {
list-style: none;
width: 1330px;
height: 100%;
}
.box li img {
width: 1330px;
height: 100%;
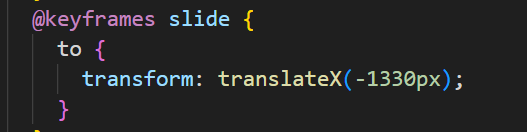
}然后进行进行关键帧动画设置
 、
、
这里只要给我们的ul 进行动画添加就可以达到效果了

完整代码:
<!DOCTYPE html>
<html lang="en">
  <head>
    <meta charset="UTF-8" />
    <meta name="viewport" content="width=device-width, initial-scale=1.0" />
    <title>CSS3云雾环绕</title>
    <style>
      * {
        padding: 0;
        margin: 0;
        box-sizing: border-box;
      }
      .box {
        width: 1330px;
        height: 100vh;
        background: url(./img/photo.jpg) no-repeat;
        overflow: hidden;
        position: relative;
      }
      ul {
        display: flex;
        width: 2660px;
        height: 100%;
        animation: slide 5s linear infinite;
      }
      .box li {
        list-style: none;
        width: 1330px;
        height: 100%;
      }
      .box li img {
        width: 1330px;
        height: 100%;
      }
      @keyframes slide {
        to {
          transform: translateX(-1330px);
        }
      }
    </style>
  </head>
  <body>
    <div class="box">
      <ul>
        <li><img src="./img/fog-2.png" alt="" /></li>
        <li><img src="./img/fog-2.png" alt="" /></li>
        <li><img src="./img/fog-2.png" alt="" /></li>
      </ul>
    </div>
  </body>
</html>原文链接:http://1.15.94.33/?id=196
=========================================
http://1.15.94.33/ 为 “前端日记簿” 唯一官方服务平台,请勿相信其他任何渠道。
Jquery 2022-12-02
Jquery 2022-12-02
Vue 2023-06-02
Jquery 2022-12-02
Vue 2023-07-14
Vue 2023-06-02
Vue 2023-07-07
Vue 2023-07-19
Vue 2023-07-03
Vue 2023-07-26
扫码二维码
获取最新动态